Pokémon Go Guide
This is a general guide to most facets of the game, explaining the basic mechanics of each major feature before giving tips on how to use it efficiently. Most of these tips are not original - they tend to be things that any savvy player can figure out on their own if they understand the mechanics involved. But not everyone does know the mechanics involved, and the places these kinds of tips are posted online tend to be scattered, so this is my best effort at compiling them, with a few of my own additions.
This guide will not include 'game-breaking' techniques (likely to be patched or tweaked in later updates anyway) or anything more nitty-gritty than an average player would need to know, for simplicity's sake. Additionally, I only discuss the default way the game works - certain events or promotions may alter details, such as by increasing the amount of candy or items obtained or temporarily making premium items available for free, but this won't be mentioned here.
The Basic Gist
Pokémon Go is an augmented-reality mobile game where you can find and collect creatures known as Pokémon, power them up and evolve them into stronger forms, and use them in battles for territory between three different teams.
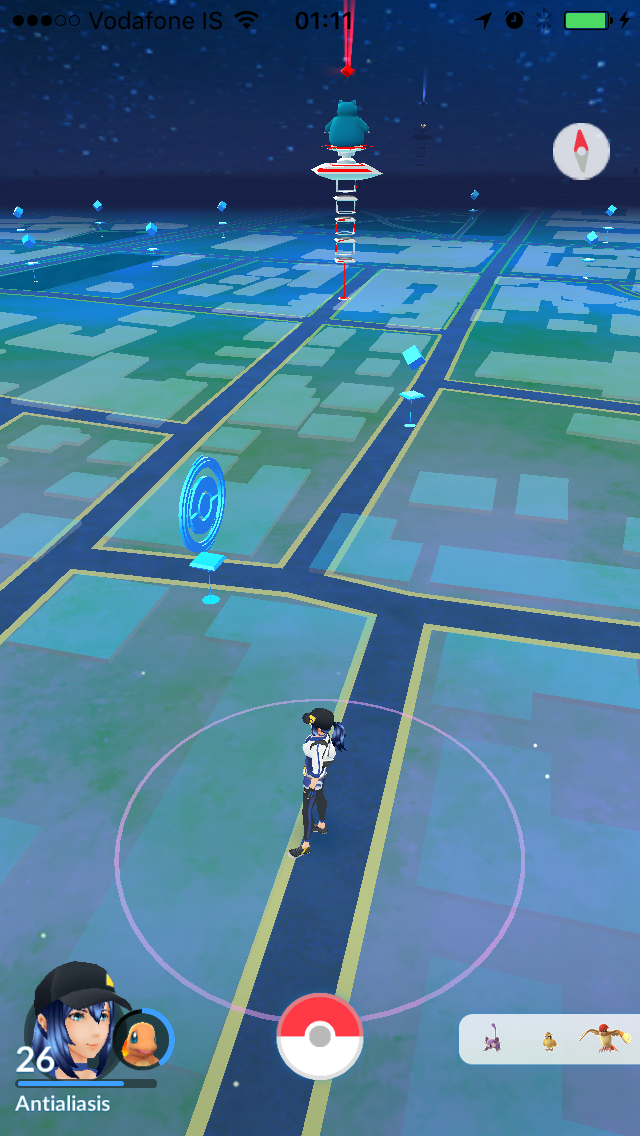
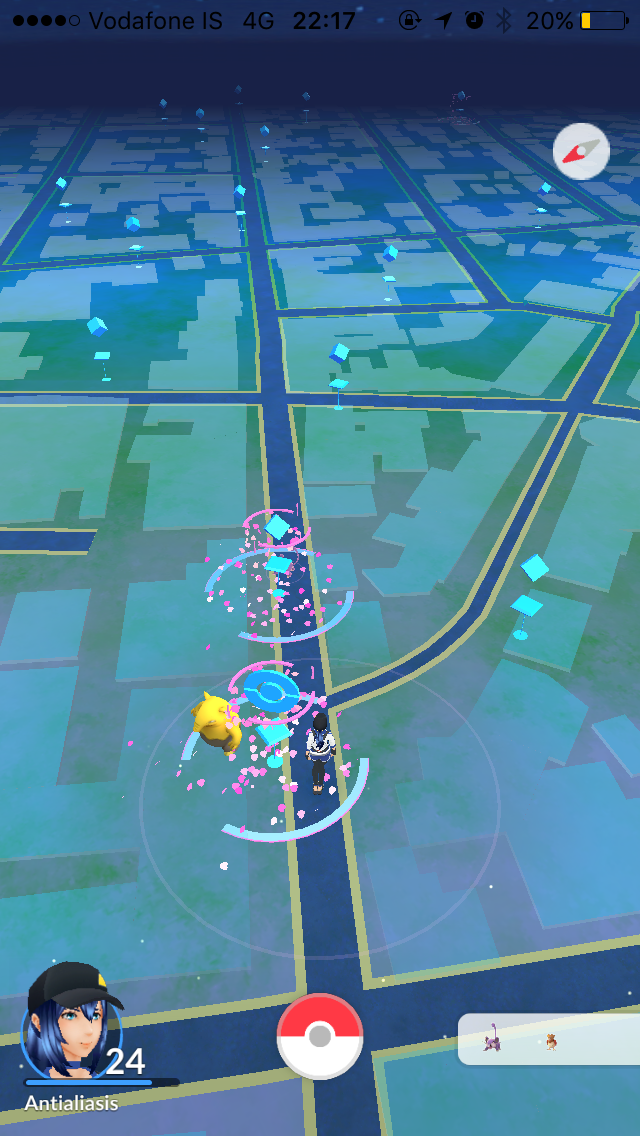
The in-game map shows a map of your real-life surroundings; you move your avatar around on the map by moving around in the real world. Certain locations are marked as Pokéstops (the smaller, light blue structures) or gyms (the larger, more colorful structures). At Pokéstops you can obtain in-game items and Pokémon eggs that can be hatched by walking around, and at a gym you can battle for control of it on behalf of your team.
The primary objectives of the game are, first, to collect every kind of Pokémon (or every kind of Pokémon available in your area) to fill out your Pokédex, and second, to competitively fight for control over as many gyms as you can. You can focus on either goal or both based on what tickles your fancy.
Items and Currencies
Pokémon Go features three basic types of in-game currencies that can be collected and exchanged for progress or bonuses:
- Candy is used to power up and evolve Pokémon. There is one type of candy for each family of Pokémon: for example, to power up or evolve a Pidgey, Pidgeotto or Pidgeot, you need Pidgey Candy, not Spearow Candy or Rattata Candy. There are five general ways to obtain candy for a given Pokémon family:
- Capturing a Pokémon will give you some of its family's candy: three for a first-stage Pokémon, five for a second-stage Pokémon (one that has evolved once), and ten for a third-stage Pokémon (one that has evolved twice).
- Hatching a Pokémon egg will give up anywhere from five to forty of its family's candy.
- Evolving a Pokémon costs a large amount of candy, but will also give you one additional candy for that Pokémon family.
- Pokémon can be transferred to Professor Willow to permanently remove them from your game, analogous to releasing a Pokémon in the main series games. In return, you will get one of that Pokémon family's candy.
- At any given time, one Pokémon can be designated as your buddy. When a Pokémon is your buddy, it will find at least one of its own species' candy every time you've walked a certain distance defined for its species; for example, Pikachu will find a Pikachu candy for every one kilometer you walk, whereas a Charmander will find a Charmander candy every three kilometers.
- Stardust is only used to power up Pokémon; if you're not interested in battling, you don't have to worry about it at all. You can get Stardust for catching or hatching any Pokémon, as well as by collecting from the shop when you have Pokémon defending gyms.
- Pokécoins are used to buy premium items in the shop menu. They can be bought for real-life money in the shop through the in-app purchase system or collected daily when you have Pokémon defending gyms.
There are two types of in-game items, basic and premium items. Basic items are obtained from Pokéstops:
- Balls: Used to capture Pokémon once encountered. Poké Balls are obtainable from the beginning of the game; after reaching level 12, you can also obtain a better kind of ball, Great Ball, and once you get to level 20, you gain access to the even better Ultra Balls. During a Pokémon encounter, you can switch balls by tapping the Pokéall icon in the bottom right corner of the screen.
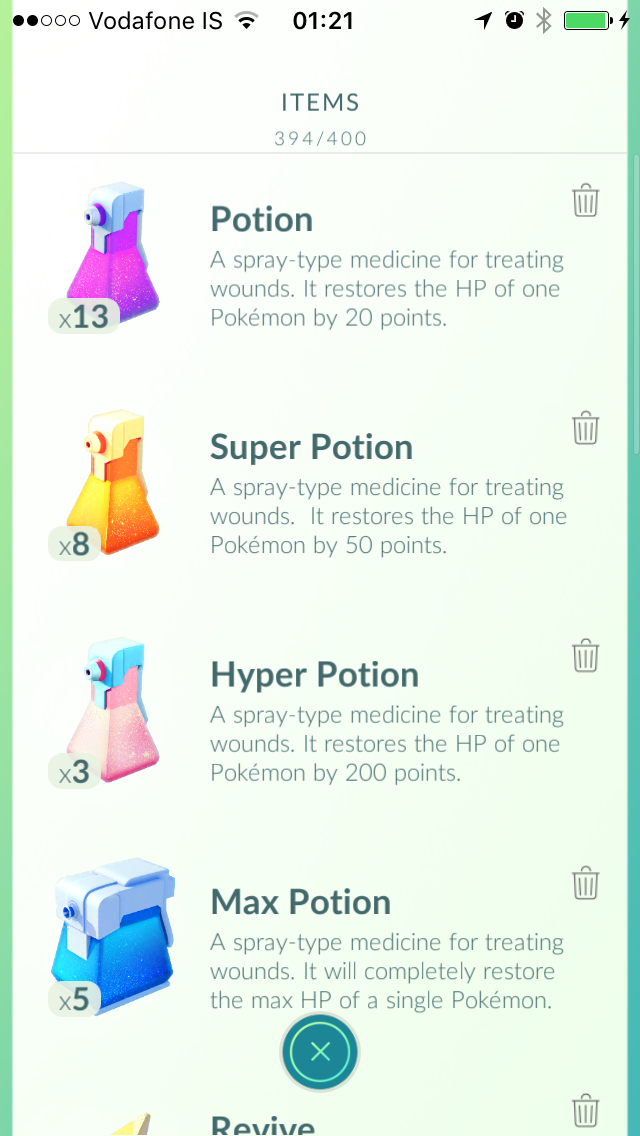
- Potions: Used to heal Pokémon after battling or training at a gym. They do not work on fainted Pokémon (ones whose HP has been reduced to zero). Potions heal 20 HP, Super Potions 50 HP, Hyper Potions heal 200 HP, and Max Potions will always bring the Pokémon to full health. Potions are unlocked at level 5, Super Potions at level 10, Hyper Potions at level 15, and Max Potions at level 25.
- Revives: Used to revive Pokémon who have fainted in battle. Revives will revive them at half of their maximum HP, while Max Revives will bring them straight to full health. Revives are unlocked at level 5 and Max Revives at level 30.
- Berries: Can optionally be used on a wild Pokémon before a capture attempt to bring about certain effects; only one berry can be in effect at a time. During a Pokémon encounter, you can use a berry by tapping the berry icon in the bottom left corner of the screen. The berries are:
- Razz Berries are unlocked to be obtained from Pokéstops at level 8. Using one will make the next capture attempt more likely to succeed.
- Nanab Berries are unlocked at level 14. After using one, the Pokémon will move less, making it easier to hit with a ball.
- Pinap Berries are unlocked at level 18. If you capture a Pokémon with a Pinap Berry in effect, it will double the amount of candy obtained for the capture.
- Evolution items: Very rare items required in addition to candy to evolve certain Pokémon. The evolution items currently in the game are the following:
- King's Rock: Used to evolve Poliwhirl (into Politoed) and Slowpoke (into Slowking).
- Sun Stone: Used to evolve Gloom (into Bellossom) and Sunkern (into Sunflora).
- Metal Coat: Used to evolve Onix (into Steelix) and Scyther (into Scizor).
- Dragon Scale: Used to evolve Seadra (into Kingdra).
- Upgrade: Used to evolve Porygon (into Porygon2).
Premium items can not be obtained at Pokéstops, but must be bought for Pokécoins in the in-game store or obtained as a reward for certain level-ups. They are the following:
- Lucky Eggs: Obtained as a reward when you first reach level 9, 10, 15, 20, 25, 30, 35 and 40, and can be bought for 80 Pokécoins in the shop. When used, you will gain double experience for all experience-granting activities for the next thirty minutes.
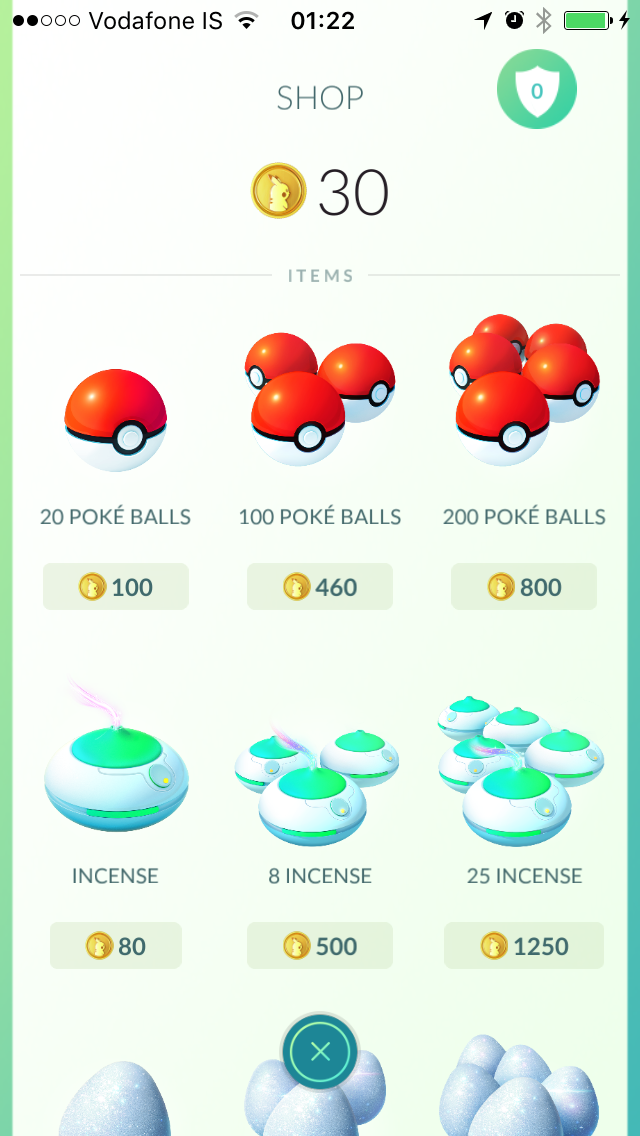
- Incense: Obtained as a reward when you first reach level 5, 7, 10, 15, 20, 25, 30, 35 and 40, and can be bought for 80 Pokécoins in the shop. When used, wild Pokémon will be attracted to your location for the next thirty minutes. The attracted Pokémon can only be seen and caught by you.
- Lure Modules: Obtained as a reward when you first reach level 8, 10, 15, 20, 25, 30, 35 and 40, and can be bought for 100 Pokécoins in the shop. Can be placed on a Pokéstop by tapping the small white tab beneath the Pokéstop's name on the Pokéstop screen when close enough to spin it; this will attract Pokémon to the Pokéstop for the next thirty minutes. The lure is visible to other players, and the attracted Pokémon can be seen and caught by anyone nearby.
- Egg Incubators: Obtained as a reward when you first reach level 6, 10, 15, 20, 25, 30, 35 and 40, and can be bought for 150 Pokécoins in the shop. To hatch an egg, it must be placed in an incubator and then walked with for a certain distance. Regular incubators will break after three uses, but the player also starts with a single Egg Incubator ∞, which can be used any number of times.
Tips and Tricks
Earning Experience

In Pokémon Go, you (or your in-game trainer avatar) have a level and gain experience (XP) as you perform in-game activities. As you level up, more gameplay features will be unlocked, and you will be able to find stronger Pokémon and obtain better items. Currently, the highest possible trainer level is 40, but each subsequent level requires more experience than the last, such that reaching level 40 by legitimate means would take months of unwavering dedication to the game.
Tips
Evolving any Pokémon gives you 500 experience points; given how simple and easily-accessible evolution is (it's one of the few things you can do in the game while sitting still, regardless of where you are), this makes it by far the easiest source of trainer experience.
Of course, to evolve Pokémon, you need some Pokémon to evolve, and you need to have enough candies to evolve them. Luckily, some of the most abundant Pokémon in the game - Pidgey and Weedle - also have some of the lowest evolution costs at only 12 candies per evolution, and while Rattata, Sentret and Ledyba (25 candies) are slightly less ideal, they're also common enough that you should be able to accumulate a few hundred of their candies with ease simply over the course of playing the game for a few weeks. Note that this only means evolving Pidgey to Pidgeotto, never proceeding to evolve that Pidgeotto into a Pidgeot: the latter wastes over four times the candy for the exact same gain as evolving a Pidgey, so if you're not planning to use the Pidgeot and already have it in your Pokédex, there's no reason to bother. Depending on what other Pokémon are common in your area, other Pokémon may also be viable candidates for 'evolution fodder'.
There are basically two ways you can go about this. First, you can simply evolve any Pidgey/Weedle/Rattata/Sentret/Ledyba you catch immediately if you have time to spare and enough candies to do so (and then probably transfer the resulting Pokémon), while otherwise transferring it immediately. This means they'll never be taking up your Pokémon storage space for an extended period of time, and it spreads the time spent evolving the Pokémon around, making things less tedious. Second, you can alternate between periods of collecting candies, where you'll immediately transfer these Pokémon, and periods of amassing a large number of them before finally mass-evolving (and then transferring) all of them, or all the ones you can before you run out of candy. This second method saves time while you're out in the field in exchange for eventually spending a tedious half-hour at home doing nothing but evolving several dozen Pokémon, and means you'll fill up your storage space with Pidgey in the second phase, but benefits from the ability to activate a Lucky Egg and get double experience for the evolutions. Since each evolution takes about twenty seconds and you need to navigate menus in between, the maximum you can feasibly evolve in the thirty minutes the Lucky Egg is active is about 70-80 Pokémon. If you want to strive for that maximum efficiency for your Lucky Egg, keep in mind you will have to free up seventy or eighty Pokémon storage slots to hold these Pokémon.
This is an entirely optional method, of course; you will level up eventually simply by playing the game as intended, and there is no real reason to be desperate to reach level 40, so if evolving throngs of Pidgey sounds boring to you, by all means skip it. But if you're close to a level that'll give you access to a new feature or item, you may want to speed things up a little bit, and evolution is how.
Collecting Items
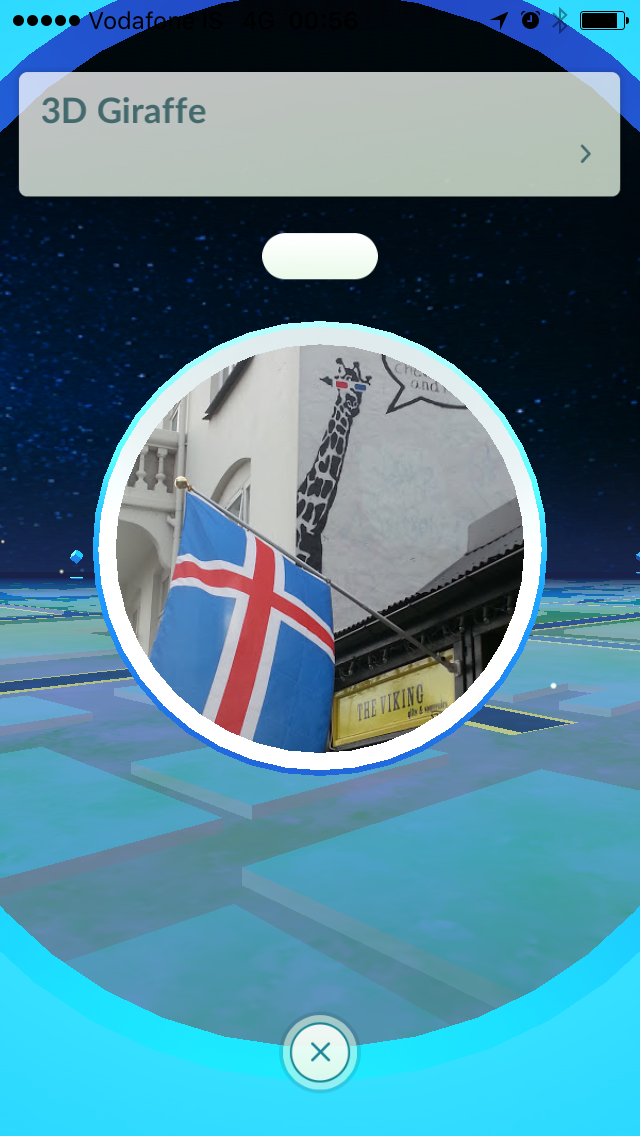
To collect items from a Pokéstop, get close to it, tap it on the in-game map, and then spin the large disc that appears on the screen with your finger. This should cause several bubbles with items in them to float out of the Pokéstop. You can pop the bubbles by tapping or dragging a finger across the screen, but that's purely for visceral satisfaction; you'll still get the items if you simply exit the Pokéstop screen immediately. It does not matter how fast you spin it or for how long.
Spinning a Pokéstop will usually give the player 50 XP. Once you've spun a stop, it will turn purple for five minutes; while it's purple, the same stop can't be spun again. If you wait for the stop to return to its original light blue color, however (note that the color change is gradual), you can spin it again, so long as you're still within range of the Pokéstop.
While the intention is for the player to walk between Pokéstops, it is also possible to spin Pokéstops from a moving vehicle if you tap them as you get close and successfully spin before the Pokéstop goes out of range again; however, this now only works if the vehicle is moving at less than about 40 km/h. (This should only be attempted if you are a passenger; do not play the game while driving yourself. You will seriously endanger yourself and others.)
Most of the time, Pokéstops will give you three items, but sometimes they will randomly give more. If you take a walk where you go past many different Pokéstops and spin them all with no more than ten minutes between any two stops, then every tenth one you spin will be guaranteed to give you six or more items, as well as giving 100 XP instead of 50. Additionally, the first Pokéstop you spin every day will give 500 XP and twice as many items as otherwise, while the first Pokéstop you spin after a seven-day streak of spinning at least one Pokéstop per day will give 2000 XP and triple the items, and as a bonus appears to have a much higher drop rate for evolution items.
Tips
The interactable radius for Pokéstops is bigger than it looks; while the stop will visually unfold when the regular pulse from your player character can reach it, it is possible to spin it from further away than that. When in doubt, just try tapping the stop - if it doesn't say "This Pokéstop is too far away", then you can spin it, even if it looks like you're not close enough.
Thanks to the ten-Pokéstop bonus, the most efficient way to go about collecting items is to find a route near you at least ten Pokéstops long, with no more than ten minutes' walk between the stops, and walk that route repeatedly. This is easiest by far in densely-populated areas with a lot of Pokéstops; unfortunately, in less-populated places, you may be out of luck for the bonus. Of course, also be sure to spin at least one Pokéstop a day for the daily streak bonuses.
Finding Pokémon
Pokémon appear in predetermined locations on the map known as spawn points, as well as appearing near you when you use an Incense or near a Pokéstop that has a Lure Module installed. The same Pokémon will tend to crop up regularly at the same spawn points, but every few weeks the spawn points get shuffled around a bit, so if a spawn point has been regularly spawning Electabuzz, it might suddenly change to spawn Pinsir instead, and so on.
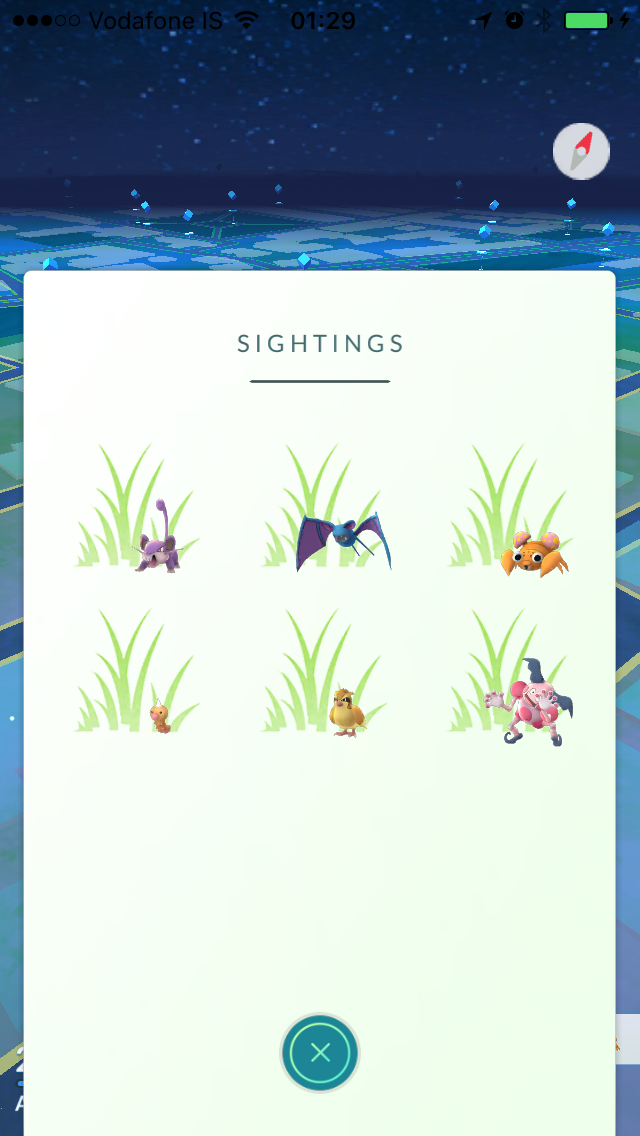
In the bottom right corner of the screen, you can access a list of Pokémon near you. Depending on the area, you may see one or both of Nearby and Sightings. The Nearby list will show each Pokémon in front of a Pokéstop photo disc and indicates that the Pokémon is near that Pokéstop - you can tap the Pokémon for details on the Pokéstop, and from there, you can tap the footprints button to have the game show you on the map where that Pokéstop is. The Sightings list, on the other hand, will show Pokémon in front of a generic grass background and indicates simply that the Pokémon is somewhere within 200 meters of your current location. Pokémon you haven't caught yet will appear as silhouettes in both lists. If at any point you happen to be within a 50-meter radius of a Pokémon, it will appear visibly on the map near you and make an audible cry, and your phone will vibrate. If you then tap the Pokémon, you can try to capture it. Note that as soon as the Pokémon appears on the screen, you can interact with it - you don't need to go to the exact spot where it is. Thus, Pokémon that are shown as being near a Pokéstop in the Nearby list aren't necessarily exactly on the Pokéstop, but if you go to the exact location of the stop, the Pokémon should be within range to show up on your map, and you should be able to capture it.
Tips
The Nearby list is very simple to use: see the Pokémon you want, tap it, tap the footprint button, then make your way to the marked Pokéstop. Finding Pokémon in your Sightings, however, is a more involved affair.
The key to tracking down Pokémon in Sightings is that if you have two points on a circle joined by a straight line, then the center of the circle will be at a right angle to the center point of the line. The 200-meter radius around the Pokémon that marks where you'll be able to see it in your Sightings list is a circle with the Pokémon at its center; all you need to do to narrow down what direction it's in is to find two points on the circle. And, at least in theory, any point at which the Pokémon appears or disappears from your Sightings list is such a point.
This might be somewhat confusing. The point is that to track down a Pokémon in your Sightings, all you have to do is the following:
- Find two spots where the Pokémon appears/disappears from the Sightings list - call them A and B - that are a reasonable distance apart and make a note of where they are on the in-game map. Note that you should make sure they're actually spots on the radius of the circle; sometimes the game can't fetch the list properly and it appears to blank out even though you're still within range of some Pokémon, and it's possible the Pokémon only just spawned or despawned. You can verify by taking a few steps back and seeing if the Pokémon disappears/reappears again.
- Using the map, estimate the spot that is exactly halfway between A and B and walk to that spot. You don't have to be too exact about this, but do your best.
- Turn to face exactly perpendicular - that is, sideways - to the imaginary line between A and B and walk straight in that direction. Again, this doesn't have to be too exact - you can go around buildings or obstacles - but try to make sure your overall trajectory is more or less directly perpendicular to the A-B line.
- If the Pokémon disappears as you walk, turn straight around and walk in that direction instead. This or the previous step should take you right past where the Pokémon is.
There are a few different techniques you can use in step one. The simplest is to use the point where you first notice the Pokémon as point A (after verifying that it's actually a spot on the radius), walk straight onwards in the same direction from there until it disappears again, and then call that location point B; this method is shown in the following diagram:
A more advanced technique, however, is to immediately turn back a bit, then walk in a curve around the first point and use the point where the Pokémon reappears on the Sightings list again as point B; this will probably save some walking, and as a bonus, you'll know immediately which direction to turn in step three, since you know the Pokémon wasn't on the list while you were walking that arc, and thus it has to be the other way. This does have the disadvantage of requiring walking in a curve, which is not always easy to do depending on your location, whereas the first method has you only walk in straight, perpendicular lines.
Of course, once you've played in an area for a while, you'll probably start to notice exactly where the nearby spawn points are and which ones are likely to spawn rare Pokémon. For example, the spawn points around the office where I work are mostly duds that spawn nothing but Pidgey, Weedle, Rattata and the occasional Caterpie and Venonat, but there are a couple of places nearby that get uncommonish but mostly unevolved Pokémon like Cubone, Sandshrew and Geodude, and one marvelous spot near the sea that spawns rare Pokémon galore in addition to being a shifting nest point for particular rare Pokémon. If I'm there and see something rare in my Sightings, I'll just walk straight to that spot by the sea, without bothering to triangulate, unless I get there and it turns out that wasn't it; likewise, if I get out of work and notice a Sandshrew I might want to grab, I'll go straight to those other two points. Try to make a note of where you find rare Pokémon and keep track of places where you've found many of them, and you'll save yourself a lot of hassle tracking down Pokémon in the future.
Incense and Lure Modules

When an Incense is used, Pokémon will be attracted to your location for the next thirty minutes. These won't be the Pokémon already on your Nearby or Sightings lists (which have already spawned elsewhere), but rather new spawns drawn from the area's usual Pokémon pool, and they will only appear for you, not for other players. The Pokémon will appear every five minutes if you're stationary, but more often if you're moving, up to one Pokémon per minute. If you're far away from all spawn points, it appears Incense will draw from a wider pool of Pokémon.
When a Lure Module is used on a Pokéstop, Pokémon will appear around the stop for the next thirty minutes, with about five minutes in between. Unlike with Incense, the lured Pokémon will be visible and catchable by all trainers in the vicinity, encouraging players to gather around the lured stop. As with Incense, Lure Modules spawn new Pokémon rather than attracting Pokémon already in your Sightings.
Tips
Based on players' observations, Incense is considerably more lucrative when used far from other spawning points - in other words, out in the wilderness somewhere, where there are normally no Pokémon. In these cases, Incense appears to spawn rarer (on average) Pokémon from many different biomes.
For lures, the location of the Pokéstop will determine what Pokémon appear; talk to other players in your area and find out where the best place to put up a lure is, or experiment by yourself if you have a surplus of lures. Because to make use of a lure you need to hang around the Pokéstop for half an hour, the best places to put up a lure otherwise are places with multiple Pokéstops reachable from a spot where you can sit down; that way, whether you lure all the stops or not, you'll at least be able to collect items while you wait.
Capturing Pokémon

On the capture screen, you will see the Pokémon (either superimposed onto your real-life environment if the AR feture is on, or on a generic forest background if it's off), and you can flick a Pokéball from the bottom of the screen towards the Pokémon to attempt to capture it, while the Pokémon may jump or attack to evade or knock away your balls. Once you've placed your finger on the Pokéball at the bottom, you will see a white circle overlaid onto the Pokémon and a colored circle inside the white circle that rapidly shrinks towards the middle before starting again from the edge of the white circle. The color of the inner circle indicates the overall difficulty of catching the Pokémon with the currently selected ball; it ranges from green to red with a full spectrum of yellows and oranges in between. The redder it is, the harder it is to catch this Pokémon with this ball.
If you successfully hit inside the colored circle when throwing a Pokéball, the throw will be designated as "Nice", "Great" or "Excellent" depending on how big the colored circle was at the time, smaller being better. If the throw successfully captures the Pokémon, you will receive an experience bonus for the capture: 10 for a Nice throw, 50 for a Great throw and 100 for an Excellent throw. If you spin the ball in a circle on the screen before you throw it, it will be a "curve ball" and curve off to the side; you will have to throw it towards the other side at a roughly 45-degree angle to compensate in order to hit the Pokémon, but if you do and it captures it, you will also get a curve ball experience bonus of 10 XP. Finally, an experience bonus of 50 XP is also awarded if you capture the Pokémon with the first ball that you throw.
To the best of our current understanding of the game mechanics according to statistical research, the odds of successfully capturing a Pokémon (given you hit it with a Pokéball) are determined by a formula that looks something like this:
CatchRate = 1 - (1 - BaseCatchRate / (2 * LevelMultiplier))modifiers
- The BaseCatchRate is the base capture rate of the Pokémon. Like in the main series, every species of Pokémon has a base capture rate that forms the basis for how hard that Pokémon is to capture overall. Rarer Pokémon will generally have a lower capture rate and thus be harder to catch. Note that base capture rates in Go do not correspond to base capture rates in the main series games.
- The LevelMultiplier is a value derived from the Pokémon's level, as explained on the stat mechanics page. Unlike the main series games, higher-leveled Pokémon are significantly harder to catch in Go. Pokémon level in this game is a hidden statistic that influences CP; higher-leveled Pokémon generally have a higher CP than lower-leveled individuals of the same species. You can't see the level of a wild Pokémon you're catching, however, only its CP, which doesn't affect catch rate in itself. (Paradoxically, this means a strong Pokémon may actually be easier to catch than a weaker Pokémon with a similar CP, because the weaker Pokémon must be higher-leveled to have the same CP - this leads to the weird perception that Pidgey and Rattata seem somehow harder to catch than some stronger, less common Pokémon.)
- The modifiers are several potential bonuses that are multiplied together. Note that this formula works differently from the main series catch rate formulas: the failure rate is being raised to a power, rather than some variable representing the success rate being multiplied by a value. A total modifier of 2 is effectively equivalent to making two attempts with a modifier of 1, a modifier of 3 is equivalent to three attempts with a modifier of 1, and so on. This means the modifiers have a greater effect the lower the original capture rate is - they'll barely make a difference if the capture is almost guaranteed already, and will generally never let you guarantee a capture. The modifiers are the following:
- The Pokéball bonus. This modifier is 1 for Poké Balls, 1.5 for Great Balls and 2 for Ultra Balls. Again, note that while these values are similar to the main series games, the way in which they factor into the formula is different.
- The curve ball bonus. If the throw is a curve ball, this modifier is 1.7; otherwise, it is 1.
- The throw bonus. This is controlled by the size of the smaller colored circle displayed on top of the Pokémon at the time of the throw, but appears to be only applied if you hit within the colored circle, i.e. if you get a Nice, Great or Excellent throw. The bonus is likely 2 - r, where r is the radius of the colored circle as a fraction of the radius of the white circle, meaning it can range from 1 to 2. A Nice throw indicates the modifier is between 1 and 1.3, a Great throw indicates it's between 1.3 and 1.7, and an Excellent throw indicates it's greater than 1.7.
- The Razz Berry bonus. If you used a Razz Berry before throwing the Pokéball, this modifier is 1.5; otherwise, it is 1. Each Razz Berry will affect one successful throw - that is, if your ball misses the Pokémon altogether, it won't count and the berry will stay in effect until you've successfully hit the Pokémon. If the capture fails, however, you'll need to use another Razz Berry to get the bonus again on the next successful throw. If a Razz Berry is currently active, you will be able to see it near the Pokémon's name and CP on the capture screen.
- The medal bonus. When you've caught 10, 50 or 200 Pokémon (individuals, not species) of a given type - Normal, Fire, Grass and so on - you'll gain a medal for that type. These medals give a bonus to the capture rate when you're catching other Pokémon of that type: the modifier is likely 1.3 for a Gold medal, 1.2 for a Silver medal, and 1.1 for a Bronze medal (and 1 for no medal). For dual-type Pokémon, you'll get the average of the two types' bonuses, according to Niantic's explanation of the feature; for example, if you have the Gold Schoolkid medal for catching 200 Normal-type Pokémon and the Silver Bird Keeper medal for catching 50 Flying-type Pokémon, then when you try to capture a Pidgey (Normal/Flying), you should end up with a medal modifier of 1.25.
For example, suppose you're trying to catch a level 20 Scyther with a curved Ultra Ball, get a Great bonus having thrown the ball when the colored circle was at 40% of the width of the white circle, have used a Razz Berry, and have the Silver Bird Keeper medal as well as the Gold Bug Catcher medal. Scyther's base capture rate in Go is 24%, or 0.24, and the level multiplier for level 20 is 0.59740001; this means the base failure rate (1 - BaseCatchRate / (2 * LevelMultiplier)) is equal to ~0.79913. The modifiers multiplied together are 1.7 * 2 * 1.6 * 1.5 * 1.25 = 10.2. Thus, the overall odds of catching the Scyther for this throw are 1 - 0.79913^10.2 = 89.84%.
If the Pokémon escapes from the ball, it may run away, which will end the encounter and cause it to disappear from your map. Pokémon can only run away right after escaping from a ball; you always get at least one chance to actually catch it, even if you miss with several balls first.
Capturing a Pokémon will give you Stardust and some candy corresponding to the Pokémon's family, depending on the evolutionary stage of the Pokémon: 100 Stardust and three candies for a first-stage such as Pidgey, 300 Stardust and five candies for a second-stage such as Pidgeotto, and 500 Stardust and ten candies for a third-stage like Pidgeot. The first Pokémon capture of every day will give 500 additional XP and 600 Stardust instead, and for the first Pokémon you capture on the seventh day in a row, you'll get 2000 additional XP and 2400 Stardust.
Tips
If you're up against a Pokémon that you really don't want to miss, be sure to use a Razz Berry, switch to the best ball you have available, throw a curve ball, and aim for the colored circle. Don't be too ambitious; it's better if you can reliably get a Great throw bonus than if you try for Excellent throws but fail half of the time. If you successfully hit the Pokémon but don't catch it, use another Razz Berry before the next ball. Hold your finger down on the ball and spin it around until the colored circle is small enough, try to make sure the Pokémon isn't about to attack or jump, and then flick the ball diagonally in the direction opposite to the direction of the spin (that is, if you spin clockwise, throw diagonally to the left, and if you spin counterclockwise, throw diagonally to the right). I find it easier to hold the phone in one hand and flick with the other hand's pointer finger, especially if the Pokémon is far away, but you should experiment and find what method you're most comfortable with.
There are different pros and cons to having the AR feature on or off for catching. When it's off, the Pokémon's location will be static on the screen, which may make it easier and more consistent to hit, besides that it's less of a drain on the battery; on the other hand, when the Pokémon appears far away, turning the AR feature on allows you to tilt your phone upwards a bit to aim your Pokéballs higher, which will make them fly further from the same flick and can be a godsend.
Ultimately, however, catching is always a matter of chance, and there is no way to guarantee a capture. If you don't get it, better luck next time!
Note that Abra, in a nod to the way it will always attempt to teleport away on its first turn in the main series games, has a 99% flee rate: if it breaks out of a ball, it will almost always immediately run away. Always use a Razz Berry and your best ball on Abra to maximize your chances, since you'll likely only get one shot.
When you need more candy to evolve a Pokémon, Pinap Berries become your best friend, particularly if the Pokémon you've encountered is low-leveled and easily caught without a Razz Berry. If you use a Pinap Berry it's good to use a better ball than you usually might, just to be safe, since your Pinap Berry is wasted if the capture fails. Try not to waste them on Pokémon that are common in your area anyway; save them for those you'd otherwise have to spend months finding enough of.
Hatching Eggs

Along with regular items, Pokéstops can also give you eggs, which will hatch into Pokémon. You can only carry up to nine eggs at a time; if you already have nine, you will not receive any more until some of your current eggs have hatched. In order to hatch an egg, you need to place it in an incubator; to do so, enter the Pokémon menu, switch to the "Eggs" tab, tap an egg, press "Start incubation", and select an empty incubator you have. You begin the game with a single orange Egg Incubator ∞, an infinite-use incubator; it can only hatch one egg at a time, however. On certain level-ups and through the store, you can obtain further blue regular Egg Incubators, which work the same way and can be used simultaneously with the infinite incubator, but will break after three uses.
After placing an egg in an incubator, you will need to walk a certain distance with the Pokémon Go app open, depending on the egg. The distance needed for each egg is displayed below the egg on the egg menu; eggs can hatch after two, five or ten kilometers, with common Pokémon and starters coming from 2km eggs, the strongest and rarest Pokémon coming from 10km eggs, and the ones in between hatching from 5km ones.
The way the distance you've walked is calculated is not entirely exact. Once per minute, the game makes a note of your GPS-reported location and compares it against the last location it recorded (that is, the place where you were a minute ago). It takes the length of a straight line between these two locations as the distance you've traveled - so if you walk in a loop and end up in the same place you started a minute later, the game will think you haven't moved at all. Then, if the distance between those points is too great for you to reasonably have gotten there on foot in the game's judgement (currently, if you're going more than 10.5km/h), it will ignore that distance; otherwise, the distance should count against all your incubating eggs, although the accumulated distance is only actually added to the eggs once every four minutes.
Pokémon that hatch from eggs tend to have better stats than Pokémon found in the wild. Unlike the main series games, where all eggs hatch into level 1 Pokémon, Pokémon in Go will hatch at the level your trainer was when you obtained the egg, capped at level 20 (that is, after level 20 all eggs you obtain will hatch into level 20 Pokémon). When an egg hatches, you will receive 500 Stardust and anywhere between 5 and 40 candies for that Pokémon species.
Tips
To get the most out of your limited-use incubators, prefer using them on 10km eggs, or possibly 5km eggs if you don't have any 10km ones. 2km eggs should always be hatched with your infinite incubator. This is simply because if you put three 10km eggs in a limited-use incubator, you can get 30 kilometers in on your eggs overall before it breaks, whereas if you put three 2km eggs in it instead, you'd only get six kilometers out of it.
The way the distance calculation works means that hatching eggs works best on foot - many players find that when biking they go too fast for the distance to count. For the best results you should walk in a relatively straight line, or at least a very soft curve, so that the game's measurements will acknowledge the full distance you traveled (or close to it).
Evolving and Powering Up Pokémon
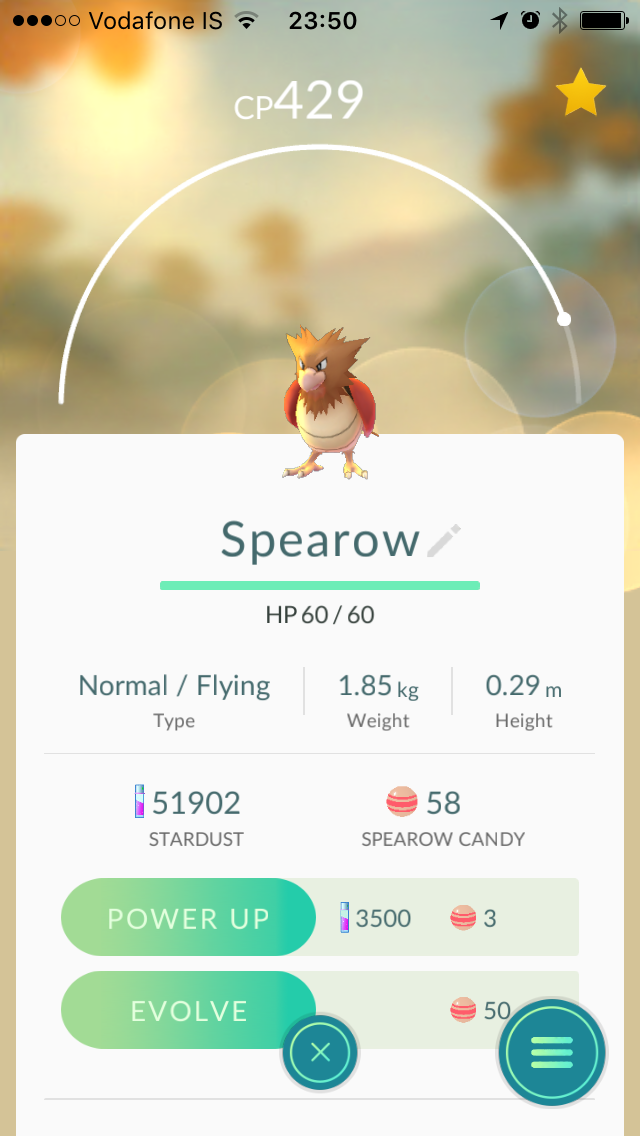
On the status screen for a Pokémon you've caught, a number called CP indicates a rough measure of the overall strength of the Pokémon in combat, and the HP displayed below the Pokémon indicates its health. There is also a white arc above the Pokémon but below the CP number; part of the arc will be "filled in", ending in a circular dot. The position of that dot along the arc indicates the Pokémon's level, a hidden number that serves as the primary reason why some Pidgey are stronger than other Pidgey. (There is also an individual factor that makes some Pidgey stronger than others of the same level, but that's outside the scope of this guide; check out the Pokémon Go Stat Mechanics page if you're interested.) At any given time, the bottom right point of the arc - the maximum level your Pokémon can reach - represents your trainer level + 1.5 (Pokémon levels in Go can be whole or half numbers); note that this means that the position of the white dot for a given Pokémon will slowly move backwards as you level up in the game if you don't power it up as you go. The Pokémon's battle stats are scaled according to its level.
Pokémon Go has two ways to make a given Pokémon stronger. First, you can power it up for Stardust and a small amount of its family's candy, which will raise its level by one half; this increases its CP and HP but leaves the Pokémon and its moves intact. Some Pokémon are caught at a higher level than others (wild Pokémon cap out at your current trainer level or level 30, whichever is lower), so how much you can power up a given Pokémon after getting it varies; since the highest possible is your trainer level, though, it'll always in theory be possible to power it up at least three times after you've caught it. Powering up a Pokémon costs more Stardust and candy the higher-leveled the Pokémon is.
Second, some Pokémon are not fully grown and can be evolved to a higher evolutionary stage, such as Pidgey to Pidgeotto or Pidgeotto to Pidgeot. Evolution costs a significant amount of candy and sometimes an extra evolution item, but no Stardust, and it will change the Pokémon into a more powerful one, which will increase its CP and HP according to its new form's base stats and give it a new, freshly randomized set of moves, but leave its level untouched. Thus, how much you can power up a Pokémon or how much it will cost does not change if you evolve it.
Generally, the candy cost for evolution will be 50 for two-stage Pokémon, such as Pikachu to Raichu; and for three-stage Pokémon, such as Bulbasaur to Ivysaur to Venusaur, the first evolution will cost 25 candies and the second will cost 100. Pokémon that require special evolution items will need this amount of candy in addition to their designated item. The exceptions are the following:
- Pidgey, Caterpie and Weedle need only 12 of their respective candies to evolve into Pidgeotto, Metapod or Kakuna respectively, which in turn need only 50 of the same candies to evolve into Pidgeot, Butterfree and Beedrill.
- Rattata, Sentret and Ledyba need only 25 of their candies to become Raticate, Furret and Ledian respectively.
- Eevee needs only 25 Eevee Candies to evolve. Generally, if the Eevee is your buddy and you have walked over 10 kilometers with it and collected two Eevee candies, it will become an Espeon if it's daytime in the game or Umbreon if it's night; otherwise, it will become a Vaporeon, Jolteon or Flareon at random. However, an easter egg allows you to guarantee one of each Eevee evolution by nicknaming the Eevee after anime characters: Rainer for Vaporeon, Pyro for Flareon, Sparky for Jolteon, Tamao for Umbreon, or Sakura for Espeon. After using a given nickname once, it will never work again for the same player, however.
- Tyrogue is a similar case to Eevee: it has a split evolution, evolving into either Hitmonlee, Hitmonchan or Hitmontop, and the evolution only costs 25 Tyrogue Candies. It appears that it will evolve into Hitmonlee if its best individual stat is Attack, Hitmonchan if it's Defense, and Hitmontop if it's HP, with ties decided at random; this mirrors how Tyrogue evolves in the main series games. You can see which your Tyrogue's best individual stats are using the Appraise feature from the Pokémon screen.
- Magikarp needs 400 Magikarp Candies to evolve into a Gyarados, mirroring how difficult Magikarp is to train and evolve in the main series Pokémon games.
Tips
In general, if you're interested in battling, it is best to only power up Pokémon after fully evolving them; this is because while your Pokémon will end up equally strong regardless of when you evolve and when you power up, evolution rerandomizes the Pokémon's moves. You might find after evolving a Pokémon that it has ended up with a bad moveset, in which case powering it up is probably a waste of Stardust.
If you're not interested in battling, however, there's no reason for you ever to power up a Pokémon; you can ignore your Stardust and just evolve to fill out your dex when you can.
If you have a Pokémon that evolves twice, you should generally avoid evolving it until you've obtained enough candy for both evolutions, not just the first one (that is, for a Nidoran male who needs 25 candies to become a Nidorino who needs 100 candies to become a Nidoking, you'll want to wait until you have 124 candies - the first evolution gives you one extra). The reason for this is that you won't know which Pokémon you're actually going to want to evolve to its final form until you can actually do so. If you evolve a Gastly into a Haunter and then find another Gastly that's way better, you're either going to end up with a less than ideal Gengar or you'll need another 25 candies to evolve the new Gastly into a Haunter. And even if you only care about completing your Pokédex and not raising good battling Pokémon, well - what if you spend 25 candies evolving a Gastly into a Haunter, only to catch a wild Haunter later? Candy is a precious resource, and it's hard enough getting 125 candies in the first place without needing an extra 25 because you made an unwise evolution choice early on - even if that means having to wait a bit longer to get a Haunter.
The Gym System

Once you've reached level five in the game, you can approach a gym and tap it to be given the option to join one of three teams, Valor, Mystic or Instinct. Which team you join does not affect any other gameplay aspects; it's a good idea to be on the same team as your friends, since then you can more easily work together to fight gyms, and depending on the proportions of players in your area it will affect how many gyms are likely to be friendly and how many are hostile, but aside from those concerns, you can simply pick whichever team personally appeals to you the most. Once you've joined a team, you can get into the final main element of the game, battling.
A gym will usually belong to one of the three teams, as indicated by the color of the gym structure: red for Valor, blue for Mystic, or yellow for Instinct. On rare occasions, however, you'll have an empty gym, small and whitish gray. An empty gym can be claimed by any level 5+ player simply by approaching it, tapping it on the screen and then adding a Pokémon to it using the button in the bottom left corner of the screen. A non-empty gym, on the other hand, will be defended by up to ten Pokémon placed there by players from the team that currently owns it.
The number of Pokémon that can defend the gym at a time is decided by the gym's level, which in turn is decided by the gym's prestige, a number ranging from 0 to 50,000 that functions a little like the gym's experience points and a little like the gym's HP. Adding a Pokémon to a gym automatically adds 2000 prestige to it, but to add more prestige, players from the team that owns it need to train at the gym, attempting to defeat the current defenders using six of their own Pokémon; if they can successfully beat some or all of the defenders, the gym will gain prestige. Once the gym has enough prestige to go up a level, any player from the team that owns it can add a Pokémon; this does not need to be the same player who trained the gym. Any given trainer can only have one Pokémon as a defender in any given gym at a time.
Meanwhile, players from the other teams can try to take over a gym by battling the defenders using six of their own Pokémon. If they manage to defeat some or all of the defenders (even if they end up losing), the prestige of the gym will decrease, and they can fight it again as many times as they like to lower it further. If the prestige lowers enough to decrease the gym's level, the defender with the lowest CP will be kicked out of the gym and automatically returned to its trainer, fainted. If the prestige reaches zero, the final Pokémon will be kicked out of the gym and it will become empty, ready to be claimed by another player. Again, this does not necessarily have to be the player who brought down the gym (though it is considered poor etiquette to sneak a Pokémon into a gym after somebody else does the work of wearing it down, and in later versions of the app you have a 30-second window in which only you can add a Pokémon after bringing down an enemy gym).
Gym defenders are always ordered by CP: a challenger will first fight the lowest-CP Pokémon in the gym, then the second-lowest, and so on. The order in which the Pokémon were added does not affect the actual order.
Once every 21 hours, you can press the shield in the top right corner of the shop menu to collect 10 Pokécoins and 500 Stardust for each Pokémon you currently have defending a gym, up to a maximum of 100 Pokécoins and 5000 Stardust. Each time you do so, you must wait at least 21 hours before doing it again; if you wish to collect for multiple gyms, you must get a Pokémon into all of them (and not get kicked out of any in the meantime) before you collect.
Tips
If you want to maximize your daily Pokécoin income from gyms, you'll want to do something like the following. First, wherever you can find high-level gyms of your own team, provided they're not level 10 yet, take the time to train them and claim a spot in them, preferably using some of the highest-CP Pokémon you have to get into a higher slot in the gym. These are long-term gyms, which your Pokémon may be able to stay in for an extended period of time - anywhere from a few days to weeks, depending on the gym's location and the nearby playerbase. A strong, determined attacker can basically always take down even a high-level gym, but it's time-consuming and uses up a lot of revives and potions, which means most players are likely to prefer to look for an easier target unless they're particularly in the mood. Once a long-term gym does get taken over, it's likely some of your teammates who also had Pokémon in the gym will come by and reclaim it, or you can do so yourself (it's easiest if you bring friends); once the gym is back in your team's possession, add your Pokémon to it again and repeat. (If you retake it alone, it may be a good idea to try to train it up several levels even after placing your Pokémon in it, so that it's harder for another team to grab it again before the rest of it gets populated.)
Assuming you aren't in ten long-term gyms, you're then ideally going to want to find a nice route you can walk every day or most days that goes by a few short-term gyms, the more highly-contested gyms that may get taken over by different teams multiple times a day. These gyms will usually be fairly low-leveled, making it easy to take them over without wasting too much time or resources. On your walk, you'll want to quickly take down or train up each gym, place a decent Pokémon in it and then move on to the next gym, until you've gotten into the last gym on your walk, at which time you should immediately claim your Pokécoins in the store. It's possible someone will come by shortly after you and take over some of your gyms even before you've completed your walk; it's up to you whether you go back to retake such gyms or if you just count them as a loss. Ideally, your walk should be short enough that most of the time you can keep all the gyms for the rest of the walk, even if sometimes you lose some. If some gyms on your route are taken more often than others, it's good to try to arrange the route so that those are some of the last gyms you visit, so there's less time between you getting into them and collecting your coins.
Of course, not everyone has easy access to the ideal kinds of gym routes; if gyms are very sparse in your area and you don't make regular visits to more populated places, you'll unfortunately have to just make the best of what you can do.
Don't be too ambitious right away; it's good to start by just getting into one short-term gym per day, which guarantees you the chance to get ten coins immediately afterwards, even if the gym goes on to be quickly retaken. Later you can start to experiment with adding more gyms to your daily routine and seeing how well it works out.
Battling
To battle at a gym, press the lower right-hand button on the gym screen after approaching the gym. Battling itself works identically whether you're training at a friendly gym or challenging an enemy gym. You never directly battle other players; rather, the defending Pokémon left there by players will be controlled by the AI during the fight.
Battling in Go, like in the main series Pokémon games, revolves around reducing the enemy Pokémon's HP to zero using your Pokémon's moves. The battle system is greatly simplified, however. Instead of the turn-based system the main series uses, Go has a faster-paced real-time battle system. Every Pokémon knows only two moves, one quick move and one more powerful charge move; each species of Pokémon has some set of quick moves it can have and some set of charge moves, and each individual has a random one of each, which can't be changed (when a Pokémon evolves, however, its moves will change to a random pick of the evolved form's moves instead, unrelated to its previous moveset). All moves simply deal damage, and there are no status ailments, stat stages or other complications. Instead, moves only vary in type, power, execution speed/cooldown, and whether they're quick or charge moves.
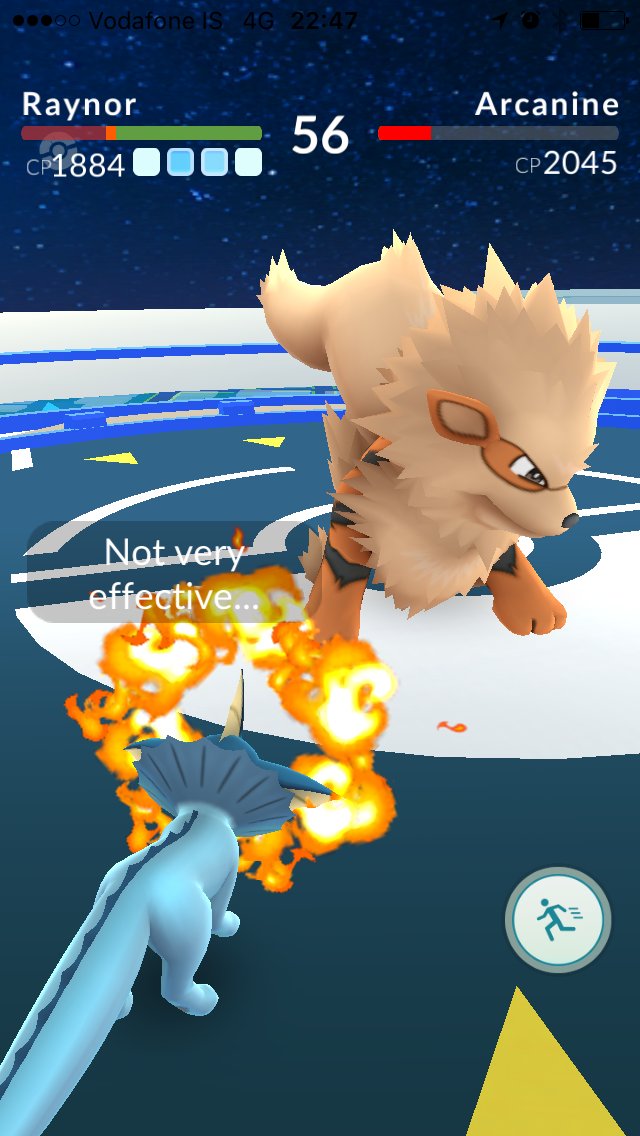
Your Pokémon's quick move can be used throughout simply by tapping the screen. As you deal damage or take damage from the opponent's attacks, your Pokémon's energy meter - the thick, purple bar or bars below its current HP - will rise; once a bar is filled, you can use a charge move by tapping and holding your finger down on the screen for a second, or until the thin blue bar that appears as you hold has filled up. Using a charge move takes more time than a quick move, but they are considerably more powerful and usually worth it if timed well.
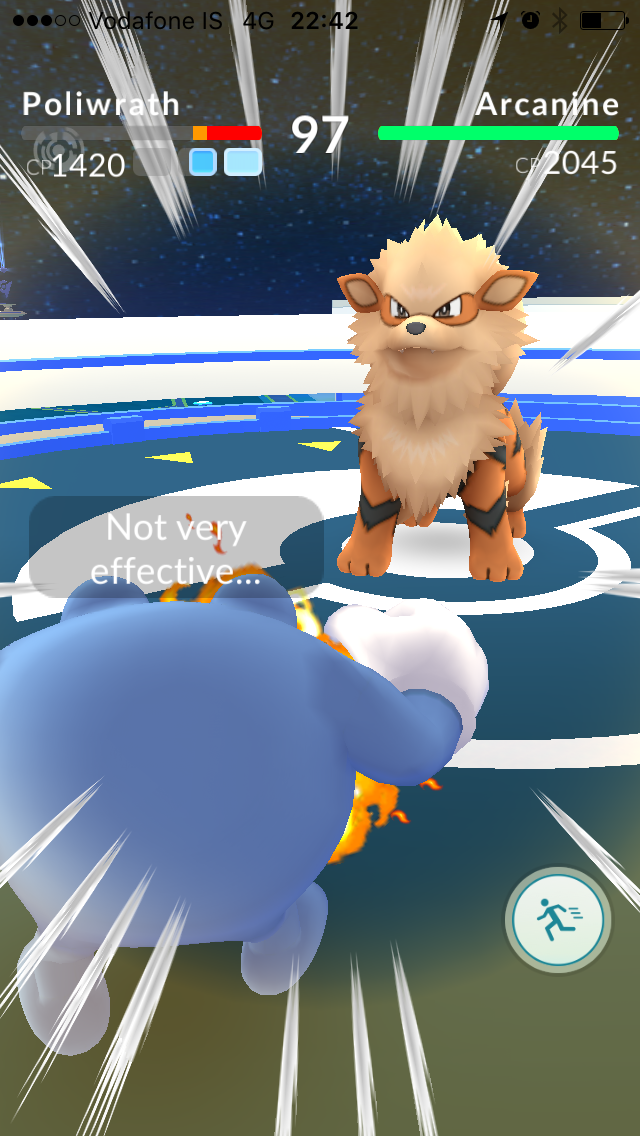
Go's battle system is asymmetrical: you and the AI do not play by the same rules. Defenders' HP is doubled in battle, meaning if you had identical Pokémon facing off against one another, the attacker would appear to be dealing only half the damage that the defender is. Weighing against this, defenders have a preprogrammed delay between their attacks: in addition to the normal variance in execution time for different moves, they will wait for anywhere between 1.5 and 2.5 seconds before trying to attack again. The exception is that every defender will use a second quick move one second after their very first one after coming into battle, and this does not affect the timing of the third move (it acts as if they'd only used the first move). Defenders will also use charge moves, with about a 50% chance that they will choose to use a charge move rather than a quick move when they have enough energy to do so. When the defender is about to use a charge move, a message should appear to warn you, but this is often buggy; the message may only appear after they've used the move, or it may not appear at all.
In addition to using moves, you can dodge by quickly swiping sideways on the screen at the right time. A dodged move will deal only 25% of the damage it otherwise would, making dodging vital especially when the opponent has a powerful charge move. When the AI-controlled Pokémon's attack is about to hit, a flash of yellow with sharp motion lines around the edges of the screen will appear; swiping just after the flash (within 0.7 seconds) will usually result in a successful dodge. Note that for moves with long animations, you will often see the Pokémon preparing the attack or even appear to be already launching it for a second or two before the flash appears, but do not be fooled: the correct dodge timing is always indicated by the flash, not by the attack animation, and you can sometimes get a fast quick move in before you actually need to dodge even if the animation has started. This depends heavily on both the length of the charge move's animation and the quick move in question, however: dodging does not work if your Pokémon is still in the middle of using a move, so slower quick moves require more care and better timing to ensure that you still get the chance to dodge. The AI will never dodge moves and takes the full damage every time (although since their HP is doubled, they can take twice as many hits as otherwise).
Like in the main series, moves have a type and Pokémon can have up to two types. All Pokémon and move types follow the sixth-generation Pokémon games. When a Pokémon uses a move that matches one of its types, its power is multiplied by 1.25, in a bonus known as STAB (Same-Type Attack Bonus). (Note that this is less than the 1.5x boost given in the main series.) Additionally, the type chart from the sixth-generation games applies, except that super-effective attacks are 1.25x more effective instead of 2x, and not very effective attacks deal 0.8 times the damage instead of 0.5. (Note that this means a neutrally effective STAB move is just as good as an equally powerful super-effective non-STAB move in Go.) As in the main series, the multipliers stack for Pokémon with two types: a Pidgeot (Normal/Flying) will take 0.8 * 1.25 = 1x damage from Fighting moves, while a Charizard (Fire/Flying) will take 1.25 * 1.25 = 1.5625x damage from Rock-type moves. Damage is always rounded to a whole number (and can be no less than 1), however, so this is not always exact.
In all battles, it is possible to give up to end the battle without further harm to your Pokémon (if you've defeated some previous Pokémon prior to giving up, those victories will still count) and switch between the six Pokémon you brought for more favorable matchups, though it will leave you vulnerable for a second. These options are the buttons on the lower right side of the screen.
All battles have a 100-second time limit for each Pokémon you fight; if you can't defeat some Pokémon within that timeframe, you automatically lose the entire battle on time. Usually each fight is over well before that, but if you're using significantly weaker Pokémon against particularly bulky defenders like Snorlax or Blissey, you might start bumping up against the time limit.
Pokémon do not automatically recover from their injuries after battling, whether you win or lose - rather, you will have to manually heal them using potions and revives obtained from Pokéstops. Fainted Pokémon must be revived with a Revive or Max Revive, while the various potions are used to recover HP in conscious Pokémon.
Tips
Although type advantages are much less significant in Go than in the main series, using Pokémon with a type advantage against the defenders is still a good idea. On the other hand, using Pokémon with super-effective moves that are not of their type is generally not worth it - a Pinsir with some Fighting moves won't do any better against a Snorlax than a Pinsir with equally powerful Bug moves (or, better yet, a stronger Pokémon with good moves of its own type), since the super-effective bonus is equal to the STAB bonus.
I generally find Pokémon with relatively fast quick moves to simply handle better and ultimately do a better job as attackers than Pokémon with slower, more powerful quick moves. This is because fast quick moves make it a lot easier to react to the enemy and dodge: you can't cancel a move in the middle of execution, so you're a sitting duck while a move is executing. With a slower move, if you want to dodge you can probably only use the move once between dodges, quite possibly wasting some time in between. (Conversely, for defenders, slower and more powerful moves are a far better idea, since not only do they not have to dodge, they always have an extra delay between their attacks that makes the differences in move speed much less significant.)
Dodging is not always necessarily a great idea, however. Charge moves should always be dodged (and are usually reasonably easy to, if the charge move message appears when it should, but if it's not working right in a given battle, you'll have to rely on noticing when the attack animation is different or when the delay between attacks is longer than usual), but quick moves usually don't do a lot of damage, and forgoing dodging in favor of continuously spamming more quick moves can be a better choice, depending on the situation. First and foremost, dodging slows the battle down by reducing both the damage dealt to you (directly) and the damage you deal (by spending time you would otherwise have used to attack), so if you've been having trouble with the 100-second timer, you should try going all-out and only dodging charge moves against that Pokémon. Second, if your quick move is slow and the timing aligns in such a way that you can only use it once and then need to wait to dodge, the amount of time you ultimately lose if you try to dodge all quick moves may be so great that it's just plain not worth it. And third, if the opponent's quick moves would normally deal less than 4HP of damage to you, then the damage reduction from dodging will be less significant or even nonexistent, since even dodging can't make an attack do less than 1HP of damage.
Things are kind of reversed when it comes to charge moves. When attacking, you waste a relative lot of time every time you use a charge move, since you need to hold your finger down and not do anything else for a second, and then you have to wait for the charge move's animation and cooldown before you can move again, almost definitely taking at least one undodged hit in the process. Given this, using a more powerful charge move fewer times (that is, a slow, heavy-hitting full-bar charge move) is generally better for an attacker than the weaker, multi-bar charge moves, unless the charge move is fast enough to be used between attacks without having to take an extra undodged hit. Conversely, defenders can't dodge anyway and are often better off with weaker charge moves that they can use more often. This depends heavily on the move, however.
The main risk of using a charge move is that the defender might hit you with a charge move while you're vulnerable. To reduce the chance of this happening, it's good to save your charge moves until just after dodging one of their charge moves: at that point, their energy is probably depleted, so their next move is likely to be a quick move. This is more reliable against defenders that have full-bar charge moves, of course: otherwise, there may be a chance they could use one twice in a row, and you'll have to assess that risk based on how much energy they're likely to have gathered by this point versus how many charge moves they've used. Another good time to use a charge move is if your bar is full or nearly full when a new defender is sent out: you know their energy is zero at that point, so it's safe to throw out the charge move after dodging the first couple of quick moves.
Leveling Up Gyms

While battling an enemy gym is pretty straightforward - just beat the defenders by any means available, then repeat as often as needed - training a friendly gym has a bit more nuance to it and is a bit more interesting.
As explained above, when training a gym, you will use six of your Pokémon and fight the defenders in the same order as usual. However, if any of the Pokémon in the gym are at a higher level than your trainer level + 2, their level will be brought down to that, and their effective CP scales accordingly - in other words, they'll go easy on you if you're a less experienced player (this feature addresses a previous issue in the game, where training up friendly gyms was actually harder than taking down enemy gyms for low-level players).
For every defender that you defeat this way, the gym will gain prestige - you will visually see the prestige increase when the battle is over, but it's actually added as soon as a defender is defeated. The amount of prestige added when you beat a defender is calculated based on the CP of the defender (as you actually fought it - so if their level was scaled down, it uses their scaled-down CP) and the CP of the highest-CP Pokémon in your team of six (even if that Pokémon did not actually take part in the battle):
- If your highest-CP Pokémon has the same CP as the defender or less, the prestige gained is 500 * (defender's CP / highest-CP attacker's CP), rounded to the nearest integer and capped at 1000.
- If your highest-CP Pokémon has a higher CP than the defender, the prestige gained is 310 * (defender's CP / highest-CP attacker's CP) - 55, rounded to the nearest integer, but no less than 100.
This means that if you use exclusively lower-CP Pokémon, the prestige you get for each defender ranges from 500-1000, whereas if you use a higher-CP Pokémon, it ranges from 100-255. Obviously, you're much better off with the lower-CP Pokémon - which means training gyms is actually one of the game's more interesting challenges, resisting pure brute force methods.
Tips
Training used to only allow you to use one Pokémon, but now that you can use a full team of six, things are considerably easier, especially when it comes to training gyms that are already high-leveled, since with a team of six you can sweep the gym to get thousands of prestige points in one go.
The key point here is that ideally you want your entire team to have a lower CP than the first defender in the gym, so that you can get 500+ prestige for each defender. If there's a huge variance in CP among the defenders (e.g. the first one or two defenders are unevolved Pokémon with a couple hundred CP, while the higher levels of the gym have a 3000 CP Dragonite), you'll want to pick out the longest consecutive run of defenders that you could comfortably beat with a team of six that all have lower CP than the first Pokémon in that run, and can do so even after having to dispose of any previous defenders, and go with that team. To save time, err towards targeting earlier runs of Pokémon.
For example, say a gym's defenders are two 200-400 CP weaklings, four Pokémon with 1100-1500 CP and three 2500-3000 CP Snorlax and Dragonite. Since there are four of the mid-CP Pokémon, you should probably have those as your target and bring a team of Pokémon with just under 1100 CP, chosen as counters to those four. They'll have to beat the weaklings first, but they shouldn't have any trouble with that. Whether you attempt some of the Snorlax/Dragonite too or escape from the battle as soon as you've beaten the last 1500 CP Pokémon is up to you (and exactly how good your team is).
Training a gym with only one Pokémon in it under the new system is unfortunately a bit tedious, since you have to bring six Pokémon, and in order to make sure they're all lower CP than the defender, you'll probably have to switch out all of the game's default picks, even though odds are you're only using one or at most two Pokémon. To make this easier, you can always order the Pokémon list by Pokédex number; odds are you've got some low-CP Pokémon near the top of that list and can easily fill out the dummy slots with them. Also note that since you can use multiple Pokémon now, you can always aim for the full 1000 prestige points for that one defender by bringing a couple of Pokémon at less than half of the defender's CP that can take it down together, plus some even weaker dummy Pokémon.
Note that the training system has implications for what Pokémon you should place in a gym, too. You are not doing your team a favor by putting a very weak Pokémon into the bottom slot; it may be easily defeated by a stronger Pokémon, but it will give so little prestige that it's more of a nuisance than anything, and meanwhile it'll take up a spot that could house an actually useful defender and be the first Pokémon to be ejected when a challenger comes along - everybody loses. Ideally you'll want to create a long run of Pokémon with relatively similar CP that are easy to take down with a team of six with less than their CP - to use the earlier example of a gym, you'd benefit later players most by adding another Pokémon with around 1500-1600 CP that'll lengthen that convenient run of Pokémon.
Etiquette
When playing Pokémon Go, be mindful of both other players and people around you in general. Do not trespass on private property, loiter around people's houses or stand where you block other people's way. Playing in restaurants or cafés is okay, but if you're going to be on their property you should buy something, reasonably proportional to the amount of time you spend there. Always dispose of your trash properly to keep the areas around Pokéstops and gyms clean; even if others have littered already, don't be a part of the problem. Absolutely do not vandalize public or private property, whether intentionally or not; don't try to climb trees, etc. that you might break, for example.
Be nice and civil to other players, including members of other teams. Friendly rivalry and humourous memes are great, but descending into genuine hatred, contempt, insults and namecalling over an arbitrary team choice in a video game is not cool and doesn't impress anyone. In particular, be nice and helpful to kids and inexperienced players.
If someone brings down or levels up a gym, they deserve to get a spot in it. Don't sneak your Pokémon in while they're finishing the battle or going through menus if you didn't actually contribute, or only contributed for a few seconds. If you and a stranger take down a gym together, ask them what team they're on; if they're on the same as you, you can both get in together immediately, but if not, you can arrange with them whether it'd be more convenient for you to go in first and them to take it from you afterwards or the other way around (if one of you is planning to collect immediately after this gym, that one should go in first).
While Pokémon Go is a nice way to meet and possibly befriend other Pokémon fans, remember to respect others' boundaries. Striking up conversation about the game is cool, and by all means help other players find that rare Pokémon you just found, but not everyone is up for an unrelated chat with a stranger out of the blue; back off respectfully if someone's not up for conversation, and never physically follow someone if they haven't invited you along (unless you simply both happen to be going after the same Pokémon, of course).
Overall, remember that it's just a game, and it's not the end of the world if you don't get this one Pokémon or get into this one gym. Try to have fun and don't take any of this too seriously.
Page last modified February 22 2017 at 04:24 UTC